For Kikimora you don't need expensive accessories or a large number of time and effort, it’s enough to use what you have at hand: an old dress, a wig and a couple of creative accessories. But first things first.
Making hair for a New Year's look
Kikimora’s hair can be described with one apt word: “chaos”, and absolute chaos. The more clutter there is on your head, the better. You can achieve the effect of unwashed, mud-stained hair in several ways:

To create artificial strands you will need several twisted strands (2-3 pieces). To avoid creating a chemical laboratory at home, use the most simple means for coloring - food coloring. Take an old unused pan and pour about a liter of water into it, dissolve the dye in it (use green color) and drop the strands there. Boil them, then add a few tablespoons of 9% vinegar and boil for another 20 minutes.
Advice. When carrying out such a procedure, be sure to create air movement in the kitchen: turn on the hood and open the window.
To achieve a non-uniform color effect, dye the linen in a curled form. The result will be a muddy, lurid, swampy color. And this is exactly what we need. After cooking, leave the strands to cool slightly, then rinse them thoroughly with water and leave to dry (one day will be enough).
Let's start creating the base of the wig: we sew a kind of cap from any fabric mesh and sew an elastic band along the edge so that the wig holds well. On top we sew layers of strands of flax hair.
Creating a costume for a New Year's look
You can either sew a dress for the Kikimora look or use an unnecessary one. Since the second option is simpler and faster, we will use it. We are sure that in any home there is at least one old dress with long sleeves. Wonderful suitable color sea green, grey, blue or green. To make the look sloppy, you need to make the dress look like rags. To do this, the sleeves and hem must be torn or cut (but do not overdo it so that scraps of fabric do not hang on the floor).
Now let's start creating the cape. Can be used transparent fabric gray or of blue color or a mesh to which strips of fabric or flax scraps can be sewn to imitate seaweed.

The final touch is the bast shoes. We knit regular bast shoes from bouclé yarn. Leather scraps can be used to create soles that need to be glued to finished bast shoes. Weave two braids from the remaining yarn and sew them to the backs of the bast shoes (with their help the bast shoes will be tied on the legs).
As additional accessories you can use “shaggy” bracelets and a staff. If you wish, you can do makeup in gray or blue-green tones: this is the effect of an unwashed face. If the goal is to create the image of an old woman, then a hooked nose made of papier-mâché will create a stunning effect.
Advice. Since the New Year's costume is intended for active entertainment, when creating it, remember that the costume should not become a second skin, but something like a cloak.
We introduced you to one of the simplest and at the same time quite spectacular options New Year's image Kikimoras for girls, in which your child will definitely make a splash. Don't be afraid to experiment, try something unconventional. Good luck!
Beautiful children's New Year's costumes: video
Natalia Nikiforova
On New Year's celebration needed kikimora costume. I made it from leftover organza.
IMG]/upload/blogs/detsad-310129-1453665240.jp1. Top part suit .
I sewed strips of green organza onto a regular green T-shirt and cut them lengthwise.
(I had a T-shirt with a pattern, so I turned it inside out and hemmed the sleeves).
g And this is how the blouse turned out.

Front view

Rear view 2. Bottom suit consists of a brown organza skirt (sewed two sides and inserted elastic) and on top of it is a second green skirt. (Don't forget to wear a small black skirt down, otherwise the organza will be very see-through).

3. Decorated with homemade lilies (I made them from leftover organza).

4. On your hand is just a flower with an elastic band and green fabric sewn to it.


5. On the head there is also an elastic band with a flower and green material, which I cut into strips. (Attaches very Just: I gathered a ponytail onto the floor of my head, pinned it with a hairpin, and put a ready-made elastic band on top).

I hope that my idea is useful to you. Don't be afraid to experiment, you will succeed!
Publications on the topic:
Autumn has a golden crown...Autumn has a golden crown. In it, the sunbeams sparkle and play pranks. It is made of maple leaves and decorated with mushrooms, snuggled.
On one of New Year's matinees I have the role of Karabas Barabas. So I decided to make a headdress for him: you can dress in different ways.
1. To make this original headdress, which perfectly complements a suit (or any bright dress, we really need it.
Herringbone hat for a costume To make a hat you will need threads for knitting TRAVKA cap which can be found later.
I bring to your attention a beautiful, quick and easy way to make a costume for a fairy-tale character. Costume for Kikimora. For a suit.
Dear colleagues, it is no secret that the material resources in many kindergartens are not rich. children. They come to kindergarten in the morning and leave in the evening.
In our kindergarten The children of the preparatory school group "At Lukomorye" graduated, in the script of which I was offered to play a role.
In mythology one can find ambiguous descriptions of this evil spirit. Either this is the night deity of restless, anxious dreams, or the spirit of a child who died unbaptized or was cursed by his parents, or a little woman - all this is considered a type of house spirit.
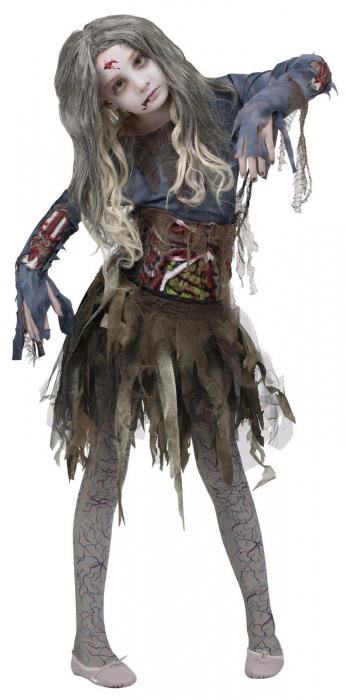
But for some reason, probably thanks to cinema and the adaptation of fairy tales, Kikimora became a swamp, a friend of the goblin and the merman, and is more in our minds represented as a swamp spirit, a kind of devil with an unpleasant face, an unkempt, crooked, ugly old woman, with sticking out disheveled hair, sloppy and dressed in rags. That's the costume Kikimora swamp I will do so.
Hair
Very important detail this suit, and maybe even the main thing is hair. I had to tinker with them, but the result was worth it.
So, Kikimora's hair should be unkempt, shaggy, sloppy-looking, slightly green with mud (Kikimora is from the swamp). Those green wigs that are on sale everywhere do not fit this description. They are very silky and do not look natural. This wig would be more suitable for a doll, but not for Kikimora.
Therefore, the most suitable material that I found for a wig is sanitary linen.
Natural fiber, easy to dye and can be easily found on the construction market, in hardware stores or plumbing stores. It's not expensive. One drawback - it has bad smell. But this smell practically disappears after painting. For a suit I only needed this twist of four twisted strands.

I dyed three strands in green colors one just boiled it in clean water with the addition of vinegar about 10 minutes and rinsed well, adding Lenor.
I think it's suitable for painting any dyes— dyes for wool, for cotton fabrics (aniline dyes). But apparently the demand for these dyes is not high, since in the nearest stores, where they were definitely available before, now I have not found such dyes. So I took advantage food coloring, which are used to color Easter eggs.

We take the worst pan, pour 1-1.5 liters of water, dissolve the paint and immerse three strands in the solution.

Bring to a boil and add 4-5 tablespoons of 9% table vinegar.

Boil, stirring lightly, for 20-30 minutes. At this time the kitchen is needed ventilate intensively b or turn on hood, because, if you haven’t forgotten (I warned you at the very beginning), the smell is still the same.
I would like to draw your attention to the form in which flax strands are dyed.

If they are left twisted, the dyed strands will be unevenly dyed. If you straighten the strands, the fibers will become very tangled, and it will be more difficult to work with them in the future. I dyed twisted strands, and the resulting uneven coloring, in my opinion, is even more interesting:

After the strands have boiled, it is better to leave them in the solution with the paint until they cool, and then rinse them well. I added Lenore to the last rinse. I dried it on the floor near the radiator on newspaper. Within a day they were completely dry. Dry dyed strands look a little sticky, but don’t let that scare you.

I decided to make not a wig, but extensions. Firstly, it’s faster, and secondly, my daughter has her own long blonde hair, and when mixed with green flax fibers, the result is a very interesting look.

To make overlays, you need to stretch a thick thread, for example, between the legs of a chair.
We separate thin strands of flax from the main strand and fasten them to the thread in this way:
We fold a strand of flax in half and wrap it around the thread.

We drag the entire strand into the resulting loop.

We try to tighten the knot as tightly as possible.
We continue to secure the strands until the extension reaches a length twice as long as the hairpin on which this strand will be attached. To make the strand fluffy, you will need to fold it in half, so the width of the finished strand should be twice the length of the hairpin.

To attach the strands you will need tight hairpins and a glue gun.
The width of the finished strand should be twice the length of the hairpin.

Hairpins must be selected especially carefully, choosing the tightest ones so that they do not slip out of the hair.
I chose these. I just tore off the bows.

We cut the prepared strand from the thread, leaving small ends. We tie these ends with a simple double knot.

Using a glue gun, glue the strand to the hairpin.

I made only six of these strands and one short one for the bangs.
I attached the strand for the bangs to another hairpin, which is more invisible on the head.

This is how the strand is secured to the bangs.

To make the hairpins on the false strands invisible, we hide them under the real strands of hair.

We comb real hair and mix it with false strands of flax.

If the child short hair or they do not at all match the color and structure of this image, then you can sew a wig.
Wig can be made by analogy with cheap masquerade wigs: sew a cap from a mesh, and attach strands of flax to the mesh. They can be sewn or tied. You can attach it in the same way that I will use below when decorating the cape.
To understand the principle, consider such a wig.
The wig consists of a cap made of mesh. An elastic band is sewn along the bottom contour.

Strands of hair are sewn onto the top of the cap.

This is what the finished wig will look like.

How to sew a dress
I sewed the dress using a pattern from a magazine. "Burda" No. 10 for 2003 model 151. The magazine can be downloaded in pdf format in the archive.
I lengthened the shelf and back to the desired size

We sew all the details and process the seams. We hem the bottom of the sleeves and dress with a Moscow seam.
I finished the neckline with bias tape and sewed on a button.

The result is a dress like this.

If you made such a dress from coarse linen or burlap, then you wouldn’t have to sew a cape. But our dress is very elegant for Kikimora. That's why we sew a cape.
How to sew a cape
I made the cape from mesh. I used the same model as the basis for the cape pattern. 151 from the magazine “Burda” No. 10 for 2003. Let's just change the pattern a little. To make the cape easier to put on, we make a dropped shoulder and lower the armhole.
We make changes to the front pattern. Now we have it one-piece and slightly flared at the bottom. We lower the shoulder line and lower the armhole. I took the sizes by eye. The green outline is the main pattern, the purple outline is the changes made.

We also make changes to the back pattern.

Adjusting the shape of the sleeve pattern.

We cut out the parts and grind them down. I did not finish seam allowances or open edges. I only finished the neckline with bias tape. There are some nuances here. Since the mesh has quite large cells, we sew the binding not along the very edge, as usual, but deeper. This way we can be sure that we will capture the entire mesh and it will not come out from under the tape anywhere.

Now we cut off the excess, focusing on the fold line in the center of the binding.

We fold the binding and stitch it to the edge.

The binding should be cut a little longer than the edge of the neckline so that it is enough for the eyelet. We form a loop and sew on a button.

Now we attach “swamp mud” to the mesh, or rather the same strands of flax. To do this, separate a small strand, fold it in half and pull it into the mesh cell using a hook.

We pull the ends of the strand into the loop formed.

And tighten the knot.

Thus, we secure the remaining strands, evenly distributing them along the bottom of the cape and sleeves.

Choose the frequency of fastening the strands yourself.

Here's what I got.

The cape is ready!

This is what a cape on a dress looks like.

The Swamp Kikimora costume is ready!

From year to year, every mother tries to make an interesting carnival costume for your beloved child.
And even despite the fact that today you can buy a wide variety of outfits on the market, a huge number of parents adhere to long-established traditions and prefer an original homemade costume. And let you have to tinker and use all your Creative skills, but in the end the result will be an absolutely unique image, the likes of which will probably not be seen in the huge crowd of children present at the New Year's party.
This article will talk about how to create a kikimora costume. It's quite extravagant and quite interesting option, which will be appreciated not only by children, but also by adults.
Who is she, swamp kikimora?
In order to understand exactly what a kikimora costume should be like, you need to get to know this fairy-tale character better and highlight its features and distinctive features.
- First of all, this is hair - it should be long and green. However, this does not mean that you need to dye your own curls. But more on that a little later.
- The kikimora costume must contain appropriate attire. It could be long dress or a skirt with a T-shirt and some kind of mesh cape, from which thread scraps hang (like seaweed).
- Particular attention should be paid to shoes - for a kikimora these are necessarily bast shoes.
- To complete the look, consider swamp-themed accessories. Bracelets and necklaces with pendants made of beads of different sizes are just what you need!
All these elements should be contained in both an adult kikimora costume and a children's one. But what they will be like depends on your imagination.
What to make hair from
Most easy way- buy a wig, but in fact, those accessories that are on sale are not quite suitable for creating the image we need, since the strands in them are too silky and shiny. And if we are preparing a kikimora costume for a girl, then we should take into account that it will not be very comfortable for the child to dance under the Christmas tree in a wig, especially if his own hair is long and thick. An excellent way out in this situation is to use clamps, which you can easily make yourself. For this purpose, you will need a fiber structure that is perfect for the role of kikimora hair. You can purchase it at any hardware store. This material can be painted with absolutely any paint or even brilliant green. Before painting, the strands should be separated and boiled separately for 2-3 minutes in a solution with paint. Next, the fibers are rinsed and dried.
How to make hairpins with strands
When the flax has dried well, begin to form the strands. The long fiber is folded in half and attached to the thread with a knot or any other in a convenient way. The thread should be filled with strands along the entire length of the clip, after which the workpiece is secured with hot glue to the clip. For this purpose, you should select good tight “crocodiles” that will not slide down your hair under the weight of artificial “curls.” There can be 5-10 such hairpins, depending on the desired result. In this way you can create luxurious green hair that will perfectly complement a kikimora costume for the New Year. The clips are attached at the roots of the hair, which is why the hairstyle looks very organic and natural.

Clothing for the kikimora look
As already mentioned, a kikimora costume can be represented by a dress, a skirt with a T-shirt, or trousers with a cape. And in each case it is very important to choose the right fabric. Pants and a T-shirt are best made from knitwear, for example, velor or supplex. These materials have an attractive appearance and stretch well, which will make the suit tight-fitting. For a cape, mesh is a good choice, which can also be purchased at a fabric store. It can be a silver or gold mesh interspersed with bouclé. For the cape you will need a piece of two lengths, which you will need to fold in half and cut a hole for the head. You can make a torn edge around the perimeter of the mesh, adding a couple of cuts to make the costume more impressive.

How to sew a skirt
Sewing a spectacular kikimora costume with your own hands is easy! Multilayer mesh, organza and satin will come in handy here. In order to make it, you will need square flaps that are placed on top of each other, shifting the corners, the sections are fixed in the center and a circle is drawn, equal in contour to the waist volume + 6-8 cm. Next, an elastic band of the appropriate length is sewn on. To prevent fabric sections from fraying, they should be basted.
The skirt can be sewn and more in a simple way. Cut out a strip of fabric of the required length. As for the width, it should be equal to 3-4 hip circumferences. First, the side seam is sewn, then the bottom of the product is processed, and the top is turned inside out so that there is a hole for threading the elastic. To make such a skirt look interesting, you should choose a beautiful fabric which drapes well. To keep it in shape, we recommend making a tulle petticoat.
How to sew a dress
A kikimora costume may consist of a dress and a mesh cape. To cut out the dress, you will need a child’s T-shirt, which is traced along the contour, and the side seams are drawn out from the armpits in the shape of a trapezoid with such a base that the baby can easily walk in it. They also outline the sleeves and cut out the details.
The dress can be with a detachable skirt - pleated or multi-tiered. To make it, you will need rectangular pieces of fabric, which are assembled with a basting stitch and sewn to the yoke.
For the top of the dress, it is best to use knitted fabric. It is easier to work with, it does not require special adjustment and fits perfectly to the figure. But for a skirt you can choose more interesting fabric, for example, with sequins or embossed flowers. To make the skirt fluffy and keep its shape well, you will need a tulle petticoat. The strip is sewn along smaller sections and gathered at the top with an elastic band, and several tiers of frills are added along the bottom, which will provide the required volume. It should be remembered that the main skirt should be slightly wider so that it fits beautifully on the petticoat.

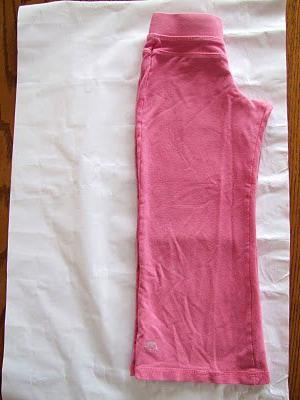
How to cut trousers and a T-shirt
In order to sew a kikimora costume with your own hands, you will need a child’s clothing that is suitable in size, according to which templates are made. This could be leggings and a blouse with long sleeve. The clothing is turned inside out, applied to the wrong side of the material, outlined with chalk or a tailor's pencil, and cut out. To remake a leggings pattern, you should put one pant leg into the other and start tracing the product from the crotch seam, going up to the middle line, then along the top and down side seam. Using this principle, the front and back halves of the trouser legs are outlined, allowances are added and details are cut out.
The T-shirt is traced along the contour, drawing out the neckline and armholes for the sleeves, which are also re-shot and cut out separately.
After the parts are sewn together, the top of the panties is turned inside out to make a drawstring for the elastic.
How to make bast shoes
What is a swamp kikimora costume without bast shoes? It is this detail that will add a special charm to the image. Bast shoes can be crocheted from thick yarn or knitted fabric cut into strips suitable color. Since our character is Kikimora, it is better to choose a green or yellow shade.
So, crochet a chain of 10 air loops and knit in a circle until the sole of the required size is ready. In this case, every second column should be knitted from one link of the lower chain. After the sole is ready, you need to knit the height of the bast shoe (about 2-3 cm). Next, knit the sock, closing it at the top. In the middle of the top of the heel, a ribbon or chain made of the same fabric is inserted directly into the fabric and secured. The length of these ties should be approximately 60 cm (each rope), so that they can be braided around the child’s leg and tied in a bow under the knee.
Accessories for the kikimora look
How to make the Kikimora costume even more interesting? Of course, adding accessories. Long beads made of large green balls entwined around the neck, a headband with a rubber frog or a large hat with a veil, a belt with hanging leaves and threads in the form of seaweed, bracelets with long pendants that will playfully dangle when your arms are raised - all these elements will bring life to the and complement the image. No matter how you create your own Kikimora costume (photos of several garments are presented in this article), it can be an excellent source of ideas and inspiration. Thanks to them, it will be possible to create a unique, harmonious and, most importantly, spectacular outfit that the child and his friends will like.

Instead of a conclusion
What is the best way to make a Kikimora costume with your own hands? Photos of finished works are a good help for beginning craftswomen. They will tell you how to play with this or that detail. However, try to bring something of your own, fantasize, improvise - you will definitely succeed! And most importantly: it is up to the child to decide what exactly Kikimora’s New Year’s costume should be, because the entire creative process of creating a carnival outfit is aimed only at bringing joy to his beloved child. Involve the baby, and then the holiday will become an unforgettable fairy tale for her.
A pleasant event unexpectedly appeared - a masquerade ball! You don’t have the time or money to order from a tailor shop or run around the shops looking for original costumes! What to do?! Well, firstly, calm down, secondly, remember that we can do everything with our own hands and thirdly, look around. What do we always have a lot of at home? Right! Plastic bottles, newspapers, garbage bags, boxes. From this we will make the most original carnival costume with our own hands.
Mermaid or kikimora
The most a nice place for a plastic bottle this is the bottom. We cut a lot of them at once. They will decorate the hem of the dress, the bodice, and you can use them to glue together an original crown. For a mermaid or kikimora costume we will need green bottles.
After cutting off the bottoms, you still need to cut off the necks, and then carefully and evenly cut the rest of the bottle lengthwise into three equal parts. Burn small holes in the narrow part and gather them on a cord into a garland, which will become a skirt. Glue, sew or staple the bottoms along the edge of the skirt.
It is better to make the bodice of the dress by covering an old T-shirt with green plastic parts. But the crown can be assembled from lush feathers cut from bottles and attached to a hoop or ribbon.
Princess of Flowers
The standing skirt for this costume is made from a wire frame. Any thin cloth. This is where the difficulties end and the creative part begins. Cut petals from bottles of different colors, collect them into flowers and attach them to the skirt. Cut half-liter bottles in a spiral and attach the “serpentine” to the skirt.

A boy's costume can be made from scrap materials by simply tying two plastic bottles together and attaching them upside down to the astronaut's back using straps. To make our jetpack functional, glue red-orange patches simulating fire into the necks with your own hands.

Helmet, hat, crown
The largest plastic bottles are simply specially produced in order to make various headdresses from them for a hero, an alien, a king, a gentleman, a puss in boots, etc.

The photo shows how to make these hats. Cut out the fields from thick cardboard. 
Costumes from…
Dress made of leaves
It's natural to go autumn Ball in a dress made of autumn leaves. To create such a masterpiece with your own hands you will need few resources: just a piece of fabric or an old dress, a large bag maple leaves and glue.

Take trash bags of two colors and cut them to make one solid fabric, and build a suit... for rain, for example.

Dresses made from improvised materials turn out amazing. Few people know that bags, even the largest ones, are glued so tightly that they can be inflated like Balloons. Inflate 15-20 bags and attach them to long skirt in several rows. The world has never seen such a gorgeous princess.
You can, on the contrary, not inflate the bags, but cut them into fringes, and then sew them on with lush red flounces.

Queen of newspaper prints
If you have stacks of old, read newspapers lying around waiting for the next repair, it's time to put them to work. Look what royal dress Lady seals can be made with your own hands. All you need to do is take a printed sheet, fold it in half for rigidity, roll it into a bag and attach it to the skirt in any way. The assembly procedure is the same as in the autumn costume.

Dinosaur and box cowboy
A great dinosaur costume can be made from boxes. You can fasten the parts with a stapler, glue or tape. This requires imagination and engineering.

Another carnival costume for a boy is a cowboy on a horse. The horse's face can be made from the same plastic bottles. It’s a pity that it’s difficult to dance in circles in such outfits, and you can’t invite a girl to a waltz, but a gift for best suit secured.

The most profitable outfit is the alien dress. Yes, because no one knows what he really looks like. Come up with whatever you want, cut it with your own hands, glue it, draw everything your imagination allows. To indicate that you are wearing an alien costume, simply attach an antenna to your head and paint your face green.
