Hello, dear readers! It would be quite difficult to do without hair ties, because sometimes you just need to put your hair in a ponytail so that it doesn’t get in the way. It is also necessary to note the fact that it is beautiful collected hair into a high ponytail or other modifications allow you to wonderfully and time-consumingly transform your image. Do you want to learn how to make elastic bands yourself? Then get comfortable in your chairs and study this review, which will tell you how to sew a hair tie.
High ponytail with stylish elastic band matching your clothes will not only look good, but really stylish! Well, since you can make such elastic bands yourself, your look will always look just perfect, because all you need to do is select the fabric for the elastic band in accordance with the material and color of the clothing.
DIY hair elastic.
- A piece of fabric of a matching color.
- Scissors.
- Sewing pins.
- Threads.
- Rubber.
- Sewing machine.
How to sew a hair tie from fabric (stages of creation).
We cut out a piece of fabric 20-25 cm long and 6 cm wide. Fold it lengthwise and pin it along the edge with pins.

We machine sew a strip along the edge. But we don’t reach the end by about 1.5 cm.

Turn the resulting tube out of the fabric. We pin and sew the two ends together.


We thread a 10 cm long elastic band inside and sew it by hand.


Then you need to manually sweep the hole into which the elastic was inserted. But you can also stitch this hole with outside on a typewriter, as shown in the video below.

Those who have been blessed by nature with long hair are often faced with the pressing question of how to decorate it and diversify their everyday hairstyle. You can use a hair tie for this. Of course, you can buy such decoration in a store. But it's not as interesting as if you make such an elastic band yourself. In this case, various materials can be used as improvised material: fabric, ribbons, knitting threads, etc.
How to make kanzashi hair bands with your own hands?
Before sewing a flower-shaped hair band, you need to prepare the following materials:
- cardboard;
- scissors;
- textile;
- needle;
- threads;
- rubber;
- bead.

Hair band - flower: master class
Before making a hair tie, prepare the following:
- thread;
- a needle;
- textile;
- suede circle big size;
- scissors;
- rivet;
- elastic band;
- glue.


Fabric hair tie
You can also make a regular elastic band without flowers. This type of decoration is easier to make. Although it requires a lot of time. For this
- required:
- sewing machine;
- scissors;
- rubber;
- fabric measuring 10 by 50 cm.


Creating hair ties is not only fun, but also interesting. Such a homemade decoration will make you stand out from the crowd, since no one else will have such an accessory. After all, this is the author's work. And the possibility of using various materials to create a hair tie will allow you to diversify your hairstyle.
The original hair decorations are elastic bands that you make yourself. They will highlight your hairstyle and allow you to quickly put your curls in a ponytail or braid. Thanks to detailed master classes in this article you will learn how to create beautiful jewelry for hair.
How to make a hair tie from fabric
New is well forgotten old. Fabric elastic bands are becoming increasingly popular. It turns out that sewing them is very simple, you just need to carefully follow each step in the instructions.
Prepare the following materials:
- a blank in the form of a simple elastic band;
- a strip of fabric measuring 90 cm by 10 cm;
- needle and thread to match the material.
Progress:
- Fold the piece of fabric lengthwise, right side inward. Take the rubber band in your hands. With the ends of the material, grasp the workpiece from the inside.
- Fasten the thread to one of the corners of the strip. Start sewing two opposite edges together, making small stitches as you go.


- Sew the entire piece of fabric in this way.


- For convenience, wrap the strip in folds along inside rubber bands.


- When you have completely sewn the edges of the fabric, secure the thread with a knot.


- Thread thumb under the material.


- Gradually turn the fabric right side out. At the same time, help yourself with your fingers, but do not pull the workpiece sharply, as the seam may come apart.


- You will get this base for the elastic band.


- Fold the edges of the cuts inward and sew them with a hidden seam.


- That's all, the hair elastic made from the material is ready!


How to make a hair tie from a satin ribbon
Another easy material to work with is tape. They have finished edges, which means the fabric will not fray.


Prepare:
- satin ribbons of different widths;
- scissors and thick thread;
- decor in the form of a button;
- candle or lighter;
- glue gun;
- regular rubber band.
Stages of work:
- Cut the widest tape to a length of 45 cm. Make cuts of the tape at an oblique angle. Now cut each subsequent ribbon 2 cm shorter. In total you need to prepare 5 elastic bands.


Advice. To prevent ribbon cuts from becoming frayed, treat them with fire or a soldering iron.
- Gather the ribbons together. Arrange them as the width of the fabric decreases. So your widest one will be at the bottom, and the narrowest one will be at the top. Visually mark the middle along the longest strip and place the thread.


Advice. If there is no twine to match the color of the ribbons, then use the narrowest ribbon.
- Pull the tapes tightly. Tie the thread tightly into several knots.


- Turn the workpiece over reverse side, pull the thread and tie an elastic band to the central part of the ribbons.


- Glue the decor on top. Don't use it too large as it will look out of place with hanging ribbons.


How to make an elastic band from threads
You can get voluminous hair bands if you knit them from thick threads. To create such an original elastic band, you only need a hook and yarn.


- Make the first loop on the thread. To do this, thread the hook through the loop and tighten it.


- Cast on 12 chain stitches. They will serve as the basis for the entire knitting.


- Thread a braid of thread through an elastic band and connect its ends with a simple stitch.


- Cast on three air loops, then connect to the main part. Continue tying the elastic in columns. You can choose any other crochet pattern that is convenient for you.


- The first row of work should be done in a circle. In this case, tie the last column together with the first.


- Tie the elastic band along the entire length in a similar way.


- Finish the work when you knit to the first row. Tie the edges together, make a knot and cut the thread.


- No one will have such an elastic band!


How to make a hair tie from fluffy wire
If you don't know how to knit or sew, then next instruction on how to create hair ties just for you. The basis for decoration will be chenille wire. It is often used to decorate bouquets.
Materials:
- fluffy wire pink and green;
- the workpiece is an elastic band.
Master Class:
- Take six pink blanks. Thread them through the elastic band and gather them together.


- Make one revolution around the axis in the central part of the wire. This way you will fix the decor with an elastic band.


Thanks to such detailed master classes, you will be able to make your own hair jewelry. The main thing is to follow every step in the instructions.
For another option for creating a hair tie from buttons, watch the video:
Do you like original and inexpensive? Then these four master classes on creating stylish hairpins are for you!
Every mother of a little princess has to constantly buy hair clips and elastic bands. They endlessly tear and stretch, decorative bows come off and lose their attractiveness, and sometimes such important accessories are completely lost. Don’t rush to take out your wallet, because you can make beautiful hair ties with your own hands from old things. My daughter will be happy with the new thing and will be happy to participate in the process!
To make elastic bands with your own hands, as in the photo, you will need:
- elastic band for sewing or unnecessary accessories;
- scissors;
- threads with a needle;
- scraps of fabric.

Let's look at four examples.
For a budget hairpin that is strictly an accessory, secure the edge of the ribbon with a rubber band, as shown in the photo. Gradually sew the ends of the ribbon along the contour of the elastic band and move it so that the hairpin becomes more voluminous. Finally, sew the two edges of the ribbon together.


For the second example, take a sewing rubber band and a strip of fabric. Fold the fabric in half and sew along the edge. Then thread the elastic through the fabric and sew the ends together, and then bring the ends of the fabric together.


In the third example, follow the same steps as in the second option, and at the end decorate with beads strung on a chain. Simply wrap the base in a circle and connect the ends of the chain.


In the fourth example of how to make a hair tie with your own hands, wrap a strip of fabric around the base, sew the edges and connect the ends of the ribbon. You can complement the accessory with a bow, felt flower or other decor.


As you can see, handicrafts do not require much time or waste. Masterpieces can be made from nothing, giving life to old things. So don’t rush to throw them away!
Hi all! My friends, although it’s not spring outside yet, the time is not far off when we will all be walking around without hats. It’s worth taking care in advance about how your head will look, especially if you have very long hair. That is why today we will make our own hair ties!
We will move, so to speak, from the most basic to something more complex. In any case, you will definitely cope with all types of these elastic bands, because I will describe in detail how to make each of them
In fact, there are simply an incredibly huge number of ideas for creating rubber bands (and not only). And almost every one of them can be brought to life with the help of simple manipulations. In general, I will show you a lot of hair accessories. Make yourself comfortable, I’ll open the door for you to the amazing (really!) world of hair accessories (no matter how strange it may sound :))
Before you start, take a look here. When you get inspired, come back))
The basis of a hair tie or the simplest model
In order to make the base, you will first need:
- linen or just a thin elastic band (15-20 cm);
- a piece of fabric (the length is approximately 2 - 3 times longer than the length of the elastic band, the width is arbitrary);
- threads in the color of the fabric;
- needle;
- pin;
- scissors.
Take the prepared piece of fabric, fold it in half lengthwise, and sew along the edge. Then fold the stitched piece with the holes facing each other and sew along the edge, leaving an opening for turning inside out. Turn the workpiece inside out.
Now insert the elastic band. Tie it, sew up the hole. That's all. This model can be used as an independent product or as a basis for a more sophisticated elastic band.

DIY hair ties: master classes and photos
You just can’t imagine how many rubber bands you can make! Now let's look at the options for elastic bands that can be made even without serious knowledge of sewing art.
Four variations
To jump into creativity right away, I suggest you take a look at these four rubber band options. You can find each of them in one way or another in my articles about homemade gifts. At the end of the article I provide links to those master classes.
In short: bows are made using multiple folds. In the first case, several ribbons are folded, and in the second, the folds are formed from one strip. The flowers are collected from tightly gathered ribbon glued to the base circle. In the latter case, a bow is also placed on top.

Here's another bow option:
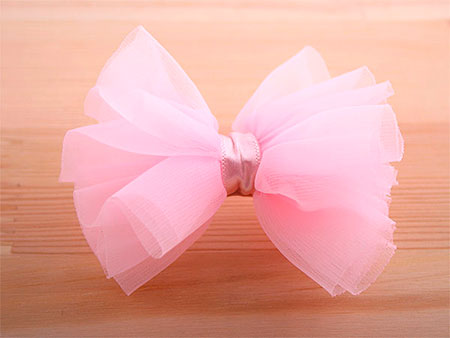
Beautiful and fashionable
I see this model very often now. Do you want to be the center of attention? Then make this beautiful and eye-catching scrunchie. Prepare a piece of fabric, wire, warp and thread with scissors.
Cut two ovals from the fabric and sew them together along the edge, leaving a hole. Insert a wire there. Place the future bow in an elastic band and tie it.

Elegant
There is no shame in wearing such an accessory for the evening. For it, prepare a base, shiny (optional) yarn, various kinds of beads and a crochet hook (although if the yarn is thick enough, you can do it with your hands).
The most important thing here is to tie the base properly. I don’t know what the correct name for this type of binding is, but it reminded me of a voluminous buttonhole stitch. As you weave, gradually add beads (this can be done later by pulling a thread through the elastic and gradually stringing them onto it).

Children's elastic bands for little girls
A five-leaf flower can be created by a simple operation: take a circle, sweep it along the edge, pull it together and stuff it. At the end, you sew it up and make several tightenings from the center. 
They love to attach such flowers to the headbands of newborns and young children in general. Take several circles of different sizes, make cuts along the edges and burn them. All that remains is to fasten it in the center with a bead.
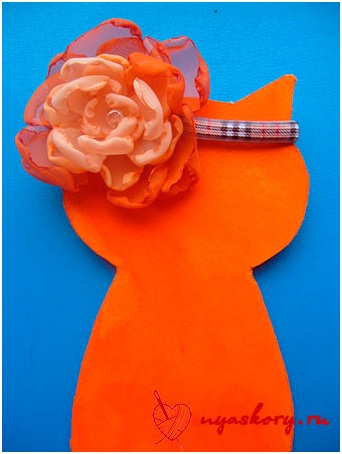
Button happiness
Do you have a few original buttons that are definitely not useful for clothes, but do not give rest to your creativity? Then put them to use! Everything is as simple as shelling pears: take an elastic band, a button and sew one to the other. If the buttons are small and the base is wide, then you can simply make button decoration.
All kinds of additional decorations are welcome: ribbons, rhinestones, etc.

Lace elastic
An elastic band can be sewn in the same way as a base for an elastic band, but with one difference: after stitching, the fabric piece does not turn inside out. With the help of lace you get a very light and playful look.

The second option is with lace: this time only the flower is made from this wonderful material, and not the entire elastic band. To do this, just gather the lace and sew it in the center, the rest is a matter of decoration.

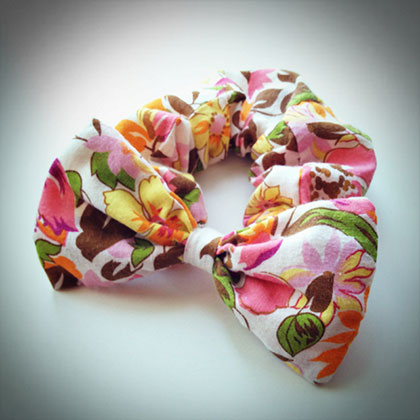
Elastic band "Bow"
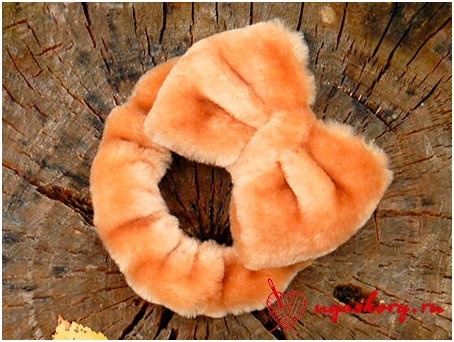
An elastic band with a bow can be sewn from absolutely any fabric! I decided to experiment with fur
Below I decided to show you in a diagram how I made the bow. First, make the base for the elastic band, and then for the bow, take a wide strip of fabric and sew it in half (the same as for the base).
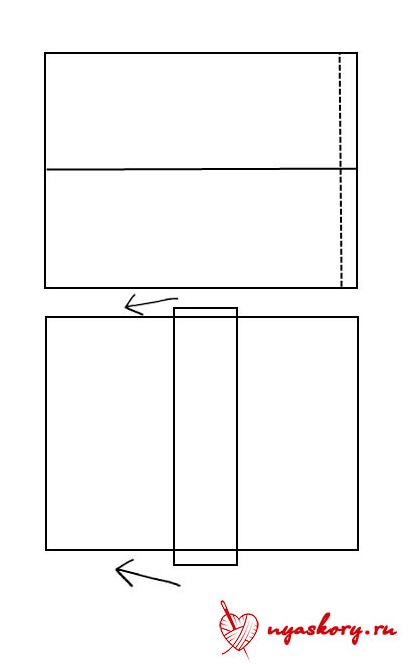
Then you sew the ends of the bow together, folding the piece in half again. Turn the elastic inside out and pull it in the center with a strip of fabric.
It turns out this cuteness:
From the usual cotton fabric you get the following:
Elastic band “Bunny ears”
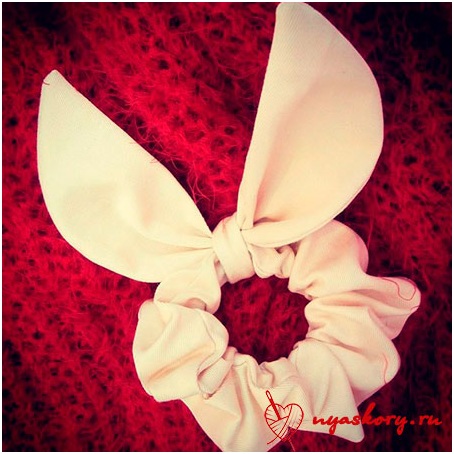
Somehow I wandered into free master class as part of the BiblioTime project (I talked about it). The theme of the handicraft meeting was rubber bands. But if everyone decorated the cut with beads, then I decided to distinguish myself by remembering the “eared” specimens.
Unfortunately, I don’t have any photos of that product, but I can tell you about the creation of an elastic band with ears
To make such an elastic band, you will need a pattern:

Again we need a base for the elastic band. The ears are tied in a knot around it and you get a romantic and girlishly delicate look. What you need for spring
Rubber band "Jack" (Halloween)
